Wednesday, July 22, 2009

You're Invited!


**the fine print : You must email layouts made prior to the release dates ( which will be provided in the product descriptions when they hit the store ) to [EMAIL="kelly@dreamersmagicdesigns.com"]kelly@dreamersmagicdesigns.com[/EMAIL] or PM them to dreamersmagic at Brownie Scraps in order to be entered in the drawing for the $5 gift certificate. Drawing will be performed on August 27th. You will be entered once for each unique layout submitted. One lucky layout will be chosen to be featured on my home page.

Although none is planned, I reserve the right to create product and release it throughout the month and this will not be retroactively included in the prior purchases of the Pre-Release Bundle. **

Here is the planned products that will be able to be purchased during our party!


Well now ya'll see all the stuff I've been working on for you! I'll also have a new freebie for you for the party as well so be sure and check it out and add it to your calendars - August 2nd and 3rd!!


post signature

Monday, July 20, 2009

Cheer on The Dream Team! and a free Twilight Word art

My girls are Bringin' it over at the DSA CT throwdown! I am so proud of each and every one of them. Please please please go show them your support and vote for The Dream Team! You can see their layouts here

If you head over to their blogs you can also pick up free quick pages of each of their layouts! ( if the qp freebies arent up when you get to their blogs, keep checking back they will be going up soon )
Jenn Tiffany Denise Eileen Sheila


By Jenn By Tiffany


By Denise By Sheila


By Eileen


I love how they showed off Moonlit Dreams and the Brand New product I made for them to use with these layouts Moonlit Dreams Accessory Pack


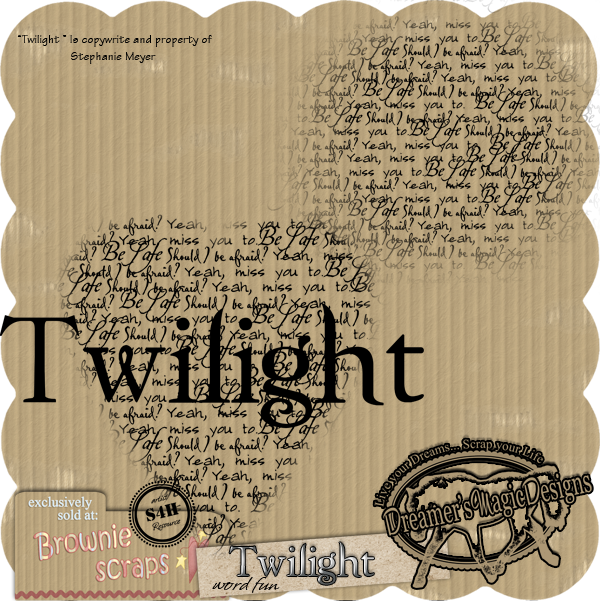
As a little bonus for you all, since I know several of you are Twilight fans like me and several of my CT members here is a little Twilight word art freebie that would look great with these kits or your favorite Twilight Kit - Click the image to download


Sunday, July 12, 2009

Freebie and an important announcement


Hi Everyone! Ive got a fun little mini kit for you all today, but i want to cover some important infomation first. Ive set up my own domain, and will be hosting freebie files from there so that you dont have to go through the hassle of 4shared! What does this mean for you? two things - first - easier downloads ! yay! Second - digifree probably wont pick up the links - what this means is that if you normally find my freebies on digifree you really need to subscribe to my blog and or newsletter! ( preferably both ) because i wont be sending a new newsletter every time i have new blog content. So right now, before you forget - follow my blog! and then hit the link to subscribe to my newsletter as well! Im including the QP today for 4shared so that hopefully you digifree readers find me, but this will be the last one. As an added bonus after you subscribe to the newsletter, and then confirm your email address in your email box youll get a 10% off coupon for anything in my store!! My newsletter is going to have exclusive discounts and freebies, so you dont want to miss it! While you are looking around, id love if you checked out ( and bookmarked ) my new homepage and would love to hear what you think! it is dreamersmagicdesigns.com

**If you have trouble getting your confirmation email or newsletters follow these simple steps **
1) check your email spam box. yahoo especially likes to send stuff to spam, that isnt spam. Tell it " not spam " and then proceed to step 2
2) add "kelly@dreamersmagicdesigns.com" to your contacts to ensure you always get your emails.

any questions or concerns please feel free to contact me at the above email address. ****

Also dont forget about our pre-release party in a few weeks! it will be jam packed with several brand new products! and another freebie as well!

Now that the offical stuff is out of the way, here is the cute little mini i designed for you all!

Elements
Papers


and your free Quick Page as well!

Thursday, July 9, 2009

Custom Drop Shadows

I said no new kits, not no new tutorials! Today was my day for the tutorial thursday at Brownie Scraps, and I wanted to share my tutorial here with you also!

Drop shadows. I sort of love them and hate them. I love them because they can make a page look absolutely fantastic. They truly can make your elements pop off the page. I hate them because they can totally positively ruin what would otherwise be an amazing page. If i notice a drop shadow first on a layout, its way to strong. Drop shadows are meant to add definition to our elements and pages, NOT to be their own element that we notice seperately.

Our CT recently investigated the cause of drop shadows that go out of control when you resize them for posting to galleries, and what they discovered was that if when you resize you do not have " scale styles " on the image size control panel checked, they go crazy on you. Your nice, pretty, behind the element shadows stay just where they were while everything gets smaller! so check that box and you may notice your gallery pages look much better!

While we are on the subject of things you can do to make your pages look better, I am going to share with you another of my thoughts and tips. Then ill get to the tutorial for realistic drop shadows.

-resize properly and proportionately. A general rule is you can size down, but you should NOT size up. Sizing up will often ruin your quality for printing. Sizing down is fine. This is why many designers put their elements larger than they need to be on a page into a kit. If we put every element, the size it should be on a 12x12 page, those people that work on larger projects, or just want something large, would possibly not be able to use half our items cause they would be to small. so giving extra large items that can be sized down, is a precaution. with that said, that doesnt mean take our button and leave it large on your page. when was the last time you saw a real button half a piece of paper big? so make it the size it would actually be, to achieve a realisitic look. to easily resize in photoshop hit Control + T then hold down the shift button while dragging a corner inwards. holding down shift will keep your proportions constrained so nothing gets stretched or distorted. You should use this tip when using the transform tool to resize anything.

Ok, ive rambled enough so how about we move on to that tutorial!

For this tutorial we are going to put a realistic looking drop shadow on a curly bow. First things first, you need to add a normal drop shadow for us to have a drop shadow to manipulate.


The standard drop shadow looks ok, but it doesnt really show how the curls would come up off the page. Just a note on using the drop shadow layer style - moving the distance slider up moves it away from the item more, and the size slider moves the spread/blurryness up you should generally leave the center slider alone for most standard purposes in scrapping. For this one, i boosted the distance slightly from the standard 5px to make it a bit more visible.

In order for us to be able to manipulate our drop shadow, we want it on its own layer so right click on the layer FX button to the right side of your layer on the layers list and chose " create layers " Now select the drop shadow layer, instead of the bow layer. this is the layer we will be editing.

Now hit Control + T to rotate this shadow. Think about where your element would be anchored to the page. I know that when you rotate it, only part of the shadow looks right, thats ok, we will fix that shortly. right now just focus on your anchor point ( or one of them ) for me, it was the center of my bow. and rotate till a part coming out from that anchor looks proper for your light source ( a note on light sources - it is generally a good idea to decide at the start of shadowing where you light will be coming from for your entire layout, as it should remain the same throughout the layout )

Now to fix that shadow that isnt sitting right for our lightsource/anchor point(s). I used my lasso tool to select the rest of the shadow that was not where i wanted it as you can see in the image above.


Keeping that selected i can rotate only that part of the layer, while leaving the non selected area unchanged. So with that selected Control + T again, and rotate and position that selection of shadow, until it looks right. if all of it doesnt look right, repeat this step on each area that you need to change.


Now we need to put the finishing touches on our shadow. Check for any jagged areas that might be sticking out or extra areas that dont need to be shadowed and erase them with a soft edged brush.

The last thing we need to do is lighten it up . Lower your fill and opacity till it looks right. I also recommend that you now select both the bow and the shadow layer and link them together so that you dont accidentally move your shadow that you just worked so hard to place so properly.


This is just one of many ways to achieve realistic and stunning drop shadows. I hope this helps you have another way to consider, and to help you bring your layouts to life. I would love to hear your thoughts, and how you do drop shadows and any shadowing or scrapping tips you would like to share with fellow blog readers and scrappers. the elements and papers in this tutorial will be available in August in a kit to be released called " Not So Tough "

For another fun challenge that is focused on learning new things, hop into our forums and check out the Baker's Technique Challenge this month, to focus on flipping images, and recoloring.

No yelling allowed!!

I know i know, Its been far to long since ive posted and updated. No yelling and no throwing things! I havent abandoned you all, or abandoned posting, i promise. Donnie came home from Iraq, and took a month off and so ive been spending time with him.

Then now that hes back at work ive been busy busy busy designing some new stuff for you all! Now thats the good news - ive got 2 brand new kits all done for you. The maybe bad news? you have to wait till August for them. Why August - because its summer, and hot, and your kids are out of school, and pools look way more enticing than computers and beaches or whatever fun things you are occupying yourself with this summer while i hide indoors from the Arizona heat.

But let me tell you, having all this gorgeous product ready for you and not giving it to you yet is hard for me!! So when it comes time to finally release them, we are gonna have a great big party!!
Details will be coming soon, but in the begining of august we are gonna have a great big Pre-Release party, where you can pick up all the kits im releasing in august ( about one a week i hope ) together, before they hit the stores for good. They will be able to be purchased during the 24 hour party, but then will be gone from the store until their respective thursday release dates. Oh and they will also be in a discounted bundle if you want them all so this is a party you do NOT want to miss. And you dont even have to hire a babysitter.

So no new kits till august, I have disapeared, but i promise, it will be worth the wait!